Audience: Administrators
Administrator Permissions let you give each administrator access only to the tools they need. Instead of giving every admin full access, you can assign permissions based on their responsibilities - for example, allowing an instructional coach to view classrooms without giving them access to rostering or settings.
Before you begin:
- You must already have the Manage Administrators permission.
- Every school or district must always have at least one administrator with both Manage Administrators and Manage Rostering permissions.
- Existing administrators automatically keep full permissions until they're edited.
Permissions Overview
| Permission | Allows admins to... | Typical roles |
|---|---|---|
| Base Permissions | Send announcements, create activities, view libraries. | Everyone* |
| Classroom Insights | View classes, student work, analytics | Most common |
| Curate Library | Add to and manage school and district libraries | Curriculum leads |
| Manage Settings | Configure school settings | Tech coordinators |
| Manage Rostering | Add/edit students, teachers, family members, classes individually or in bulk | SIS managers |
| Manage Administrators | Add, remove, edit other school and district administrators | Lead admins |
| Audit Messages | View, download, and remove past messages between teachers, students, and families in the district. | Compliance, leadership |
*This permission cannot be removed from any administrator.
Viewing the Administrator Tab
In the Administrators Tab, you manage Administrator access in your School or District.
- *Add Administrators: Add new administrators to your School or District.
- Edit Permissions: View and edit Administrator permissions in bulk.
- Manage Job Title: An open field to identify an Administrator's job in your school.
- Last Login Date: See when Administrators were last active in Seesaw.
- *Remove Administrators: Remove users that no longer need Admin access in your School or District.
How to Add Administrators
- Tap Add Administrator.
- Enter Name, Job Title, and Email.
- Tap appropriate permissions for the user. Pick the permissions that include features they need access to, and we’ll take care of the rest! You can assign multiple permissions or edit their permissions at any time.
- Tap Save & Invite Administrator.
Confirm by tapping Invite Administrator.
How to Manage Existing Administrators
1. Tap Edit Permissions.
2. Edit the permissions associated with any existing Administrator in School or District.
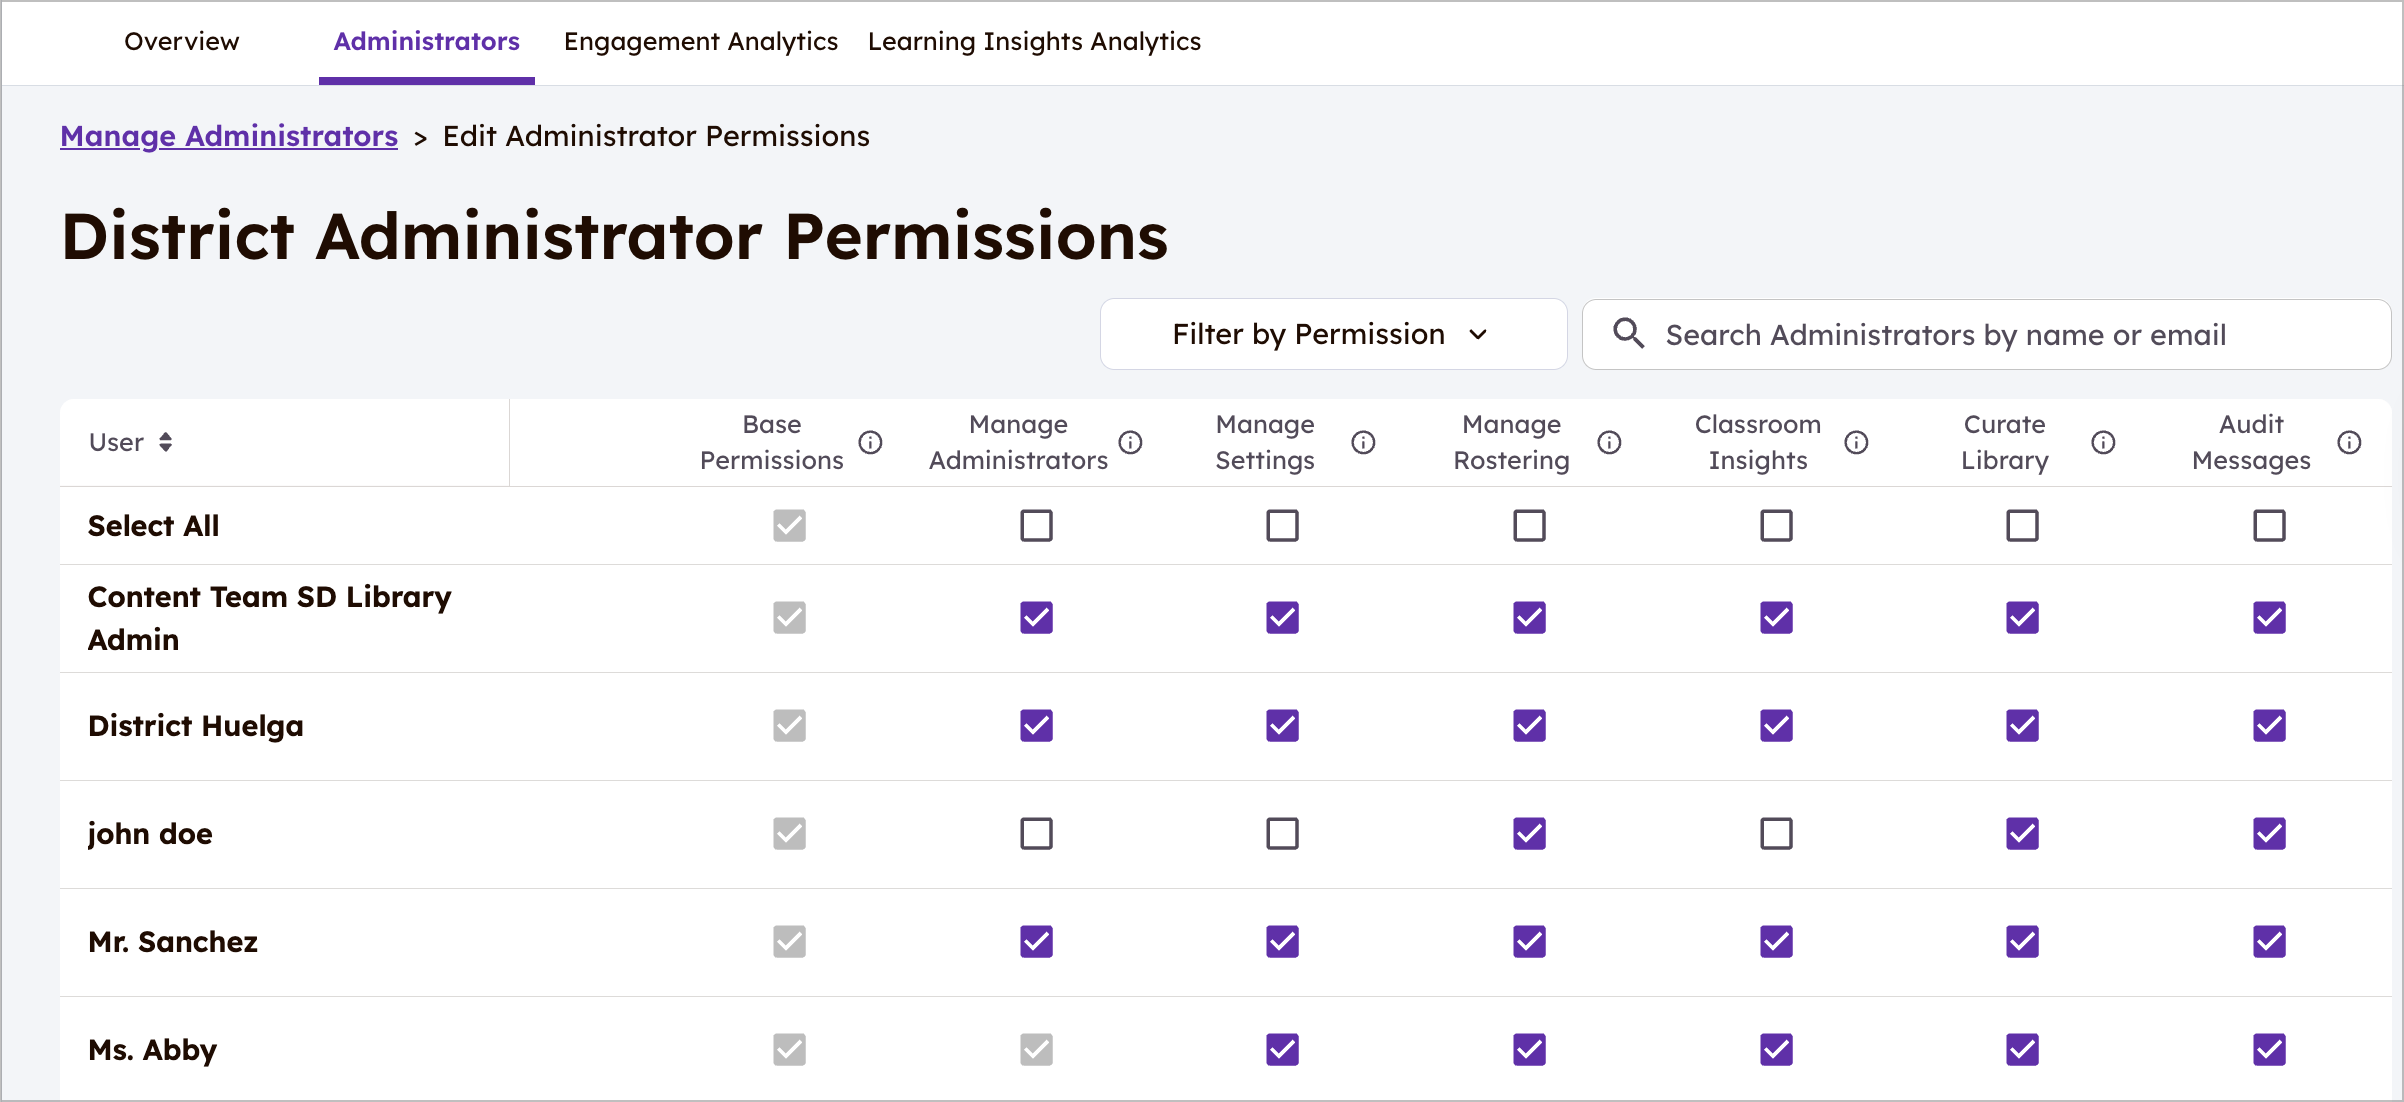
2. Edit the permissions associated with any existing Administrator in School or District.
How to View Permissions
1. Tap Account Settings.
2. Tap District Administrator Permissions.
2. Tap District Administrator Permissions.
FAQ
Will a District Administrator have the same permissions at the schools within their district?
Yes. District Administrators will inherit their District permissions when viewing school dashboards. You don't need to add a District Administrator to each school dashboard. For example, if a District Admin is assigned 'Classroom Insights' permissions at the District level, they have access to the analytics dashboards on the District Dashboard; as they navigate to a school dashboard they will access to school level analytics, as well as the ability to view classes and engage with student work.
What permissions do "synced through 3rd Party Rostering" start with?
All new Administrators that are created during Clever/Classlink sync will start "Base Permissions." Additional permissions can be added by an Administrator with Manage Administrators permissions at any time. Existing Administrators, even if not previously synced through Clever or Classlink, will have full permissions because they existed prior to August 2025. Note: Administrators are not created or managed via Wonde, all Admininstrators must be added manually for Wonde rostering schools & districts.
Are Admins alerted when their permissions change? Yes, an email is sent to the affected Administrator when permissions are changed.
Yes. District Administrators will inherit their District permissions when viewing school dashboards. You don't need to add a District Administrator to each school dashboard. For example, if a District Admin is assigned 'Classroom Insights' permissions at the District level, they have access to the analytics dashboards on the District Dashboard; as they navigate to a school dashboard they will access to school level analytics, as well as the ability to view classes and engage with student work.
What permissions do "synced through 3rd Party Rostering" start with?
All new Administrators that are created during Clever/Classlink sync will start "Base Permissions." Additional permissions can be added by an Administrator with Manage Administrators permissions at any time. Existing Administrators, even if not previously synced through Clever or Classlink, will have full permissions because they existed prior to August 2025. Note: Administrators are not created or managed via Wonde, all Admininstrators must be added manually for Wonde rostering schools & districts.
Are Admins alerted when their permissions change? Yes, an email is sent to the affected Administrator when permissions are changed.