Audience: Teachers with Seesaw Instruction & Insights
🎉 The Seesaw Schoology integration allows teachers and students to easily access Seesaw activities from within Schoology. The integration links your Schoology classes to your Seesaw classes, via your existing rostering methods for both tools.
Integration Overview
- District Admin can set up their LTI connection from District Dashboard
- Teachers can set up their Class connections (1:1 class mapping)
- Teachers can create assignments / search Seesaw Library in Schoology
- Students can respond to assignments/activities in Schoology
- Teachers can grade assignments in Gradebook in Schoology
Set Up and Pair Classes between Seesaw <> Schoology
1. Sign in to Schoology.
2. Tap Courses and select your Class.
3. Tap Add Materials and select Seesaw.
4. Sign into your Seesaw Account when prompted.
5. Select Class to be Paired and tap Connect Seesaw to Schoology.
Each class will need to be paired individually.
Once complete, you be prompted to View Seesaw Activities and can begin assigning activities!
Assigning Activities in Seesaw <> Schoology
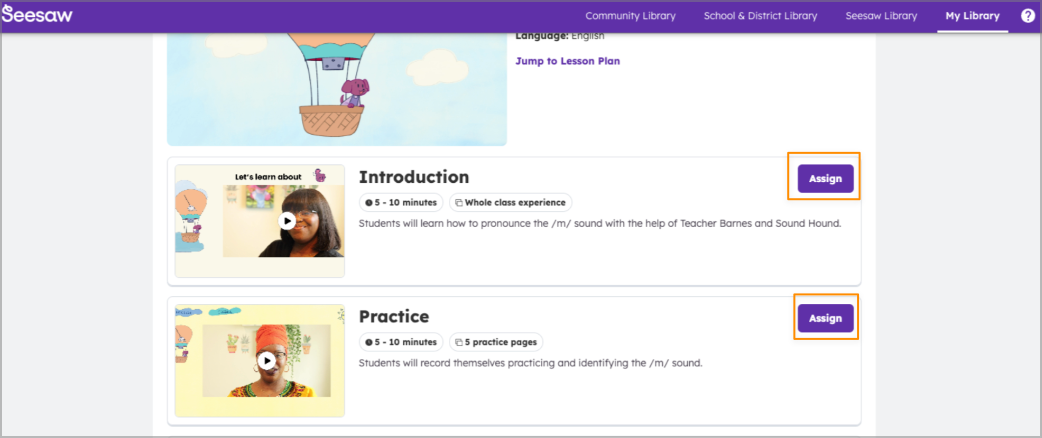
In Seesaw Library, you are prompted to browse, select and Assign activities to students.

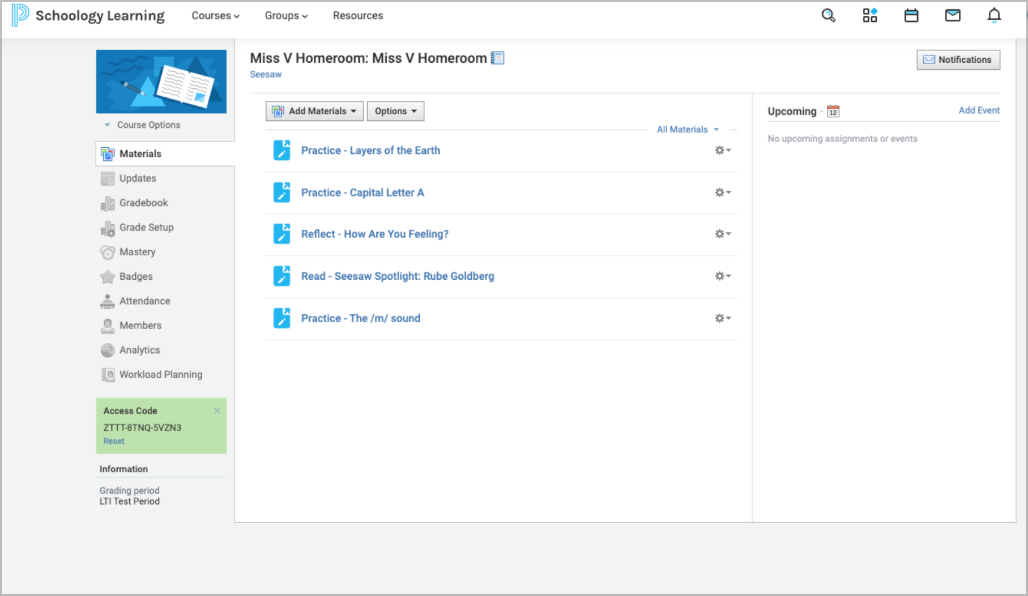
Assigned activities can be seen in the Schoology Dashboard for your class.

How to Enable Grading on an Activity
Adjust the activity settings in Schoology on each activity if you would like it to be gradable.
1. Select the activity.
2. Tap the gear icon.
3. Tap Edit and tap Enable Grading.
4. Select Points graded, Due Date, Category, and other settings.
Assigned activities can be seen in the Schoology Dashboard for your class.
How to Enable Grading on an Activity
Adjust the activity settings in Schoology on each activity if you would like it to be gradable.
1. Select the activity.
2. Tap the gear icon.
3. Tap Edit and tap Enable Grading.
4. Select Points graded, Due Date, Category, and other settings.
Reviewing and Rating Activities in Seesaw <> Schoology
Teachers have the ability to review, rate, comment, like, approve and send back activities in Schoology. Once approved, all ratings, comments, likes, etc. will be visible in Seesaw for all account types (including students, families, etc.).
How to Review an Activity
1. In Schoology, tap on Activity to Review.
2. Tap on Review on Student work and review activity as needed.
How to Review an Activity
1. In Schoology, tap on Activity to Review.
2. Tap on Review on Student work and review activity as needed.
Grading Activities in Schoology via Gradebook
A Schoology feature, Gradebook, can be set up at different levels: Class level, school level, or district level. It will look different for all teachers as its a customizable feature. Activities are hyperlinked in Gradebook so you can easily access activities. Once an activity is set as gradable. you can manually enter activity grades into Gradebook.
Troubleshooting
While pairing your Schoology account with your Seesaw account, you may encounter an error screen 'Uh Oh! Something went wrong.'
This error typically occurs if the email associated with your Schoology account is not associated with a teacher account in Seesaw. Contact your Seesaw School or District Administrator to create or add your Seesaw account to the school dashboard.
If the error persists, please confirm that your email address is spelled the same in both Schoology and Seesaw.
Student Experience
Depending on whether or not you have Third Party Partioning enabled, pairing classes between a student's Seesaw and Schoology accounts will look a bit different:
Set Up and Pair Classes between Seesaw <> Schoology (Third Party Partitioning Disabled)
1. Students sign in to their Schoology account.
2. Tap Courses.
3. Tap an Assigned Activity and the student will be prompted to sign in to their Seesaw account. (Students only need to sign in one time to establish the pairing.)
4. Tap Add Response to open a new tab to complete an Activity.
5. Once activity is completed, tap the Green check and select prompt to Return to class.
Student will be brought back to their Schoology Class Dashboard.
Set Up and Pair Classes between Seesaw <> Schoology (Third Party Partitioning Enabled)
1. Students sign in their Schoology account.
2. Tap Courses.
3. Tap an Assigned Activity and the student will be prompted to sign in to their Seesaw account. (Students only need to sign in one time to establish the pairing.)
4. Tap Add Response.
5. Sign in once again to Seesaw account. Please note: Because the Schoology sign in could not be authenticated in the new tab, students are prompted to sign in once more.
6. Tap Add Response to open a new tab to complete an Activity.
7. Once activity is completed, tap the Green check and select prompt to Return to class.
Student will be brought back to their Schoology Class Dashboard.