Audience: Administrators with District subscriptions
🎉 The Seesaw Canvas integration allows teachers and students to easily access Seesaw activities from within Canvas. Link Canvas classes to Seesaw classes using your rostering methods for both tools.
Integration Overview
- Streamline the process of creating and completing assignments directly in Canvas.
- Teachers can add Seesaw activities to Canvas assignments.
- Students can complete Seesaw activities while remaining in Canvas (web).
Requirements
- Only the District's Canvas Admin can set up the integration.
- The Admin must contact their Seesaw CSM to request activation of the Canvas integration.
- Available only for districts with subscriptions. (Single school purchases are not eligible).
- Teachers and students must:
- Be using licences that are part of a Seesaw subscription (no Seesaw Starter accounts).
- Already be rostered in Seesaw.
- Have no cookie blockers enabled.
- Be using desktop web (not available on mobile).
- Be using a Chrome browser.
- Log in via email, GoogleSSO, CleverSSO, ClasslinkSSO, OktaSSO, or MicrosoftSSO.
How to Connect District (Seesaw) to Canvas
Before you begin, make sure your Seesaw roster is up to date. If it is not up to date, students may not be able to log into Seesaw from Canvas. (Technical setup steps are here if you need to update.)
1. In Seesaw, tap District-Wide Settings on the District Dashboard.
2. Tap LMS Integration.
3. Select Canvas and click Next.
4. Tap Copy Json URL.
Next, go to Canvas and log into your Canvas account.
1. Navigate to the Admin tab on the left side panel.
2. Scroll down and click on Developer Keys in the secondary panel.
3. Click +Developer Key.
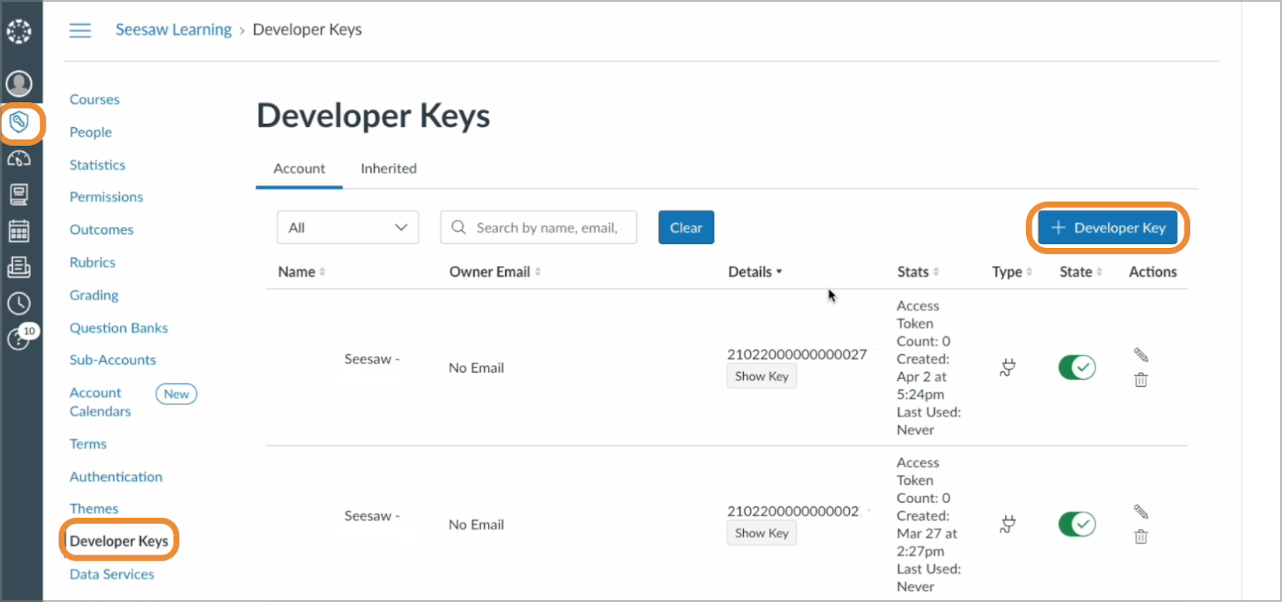
4. Select +LTI Key from the dropdown.
5. Enter the following on the Key Settings screen:
Key Name: Seesaw
Method: Select Enter URL
JSON URL: Paste the JSON URL from Seesaw
Redirect URI: https://app.seesaw.me/api/lti/launch
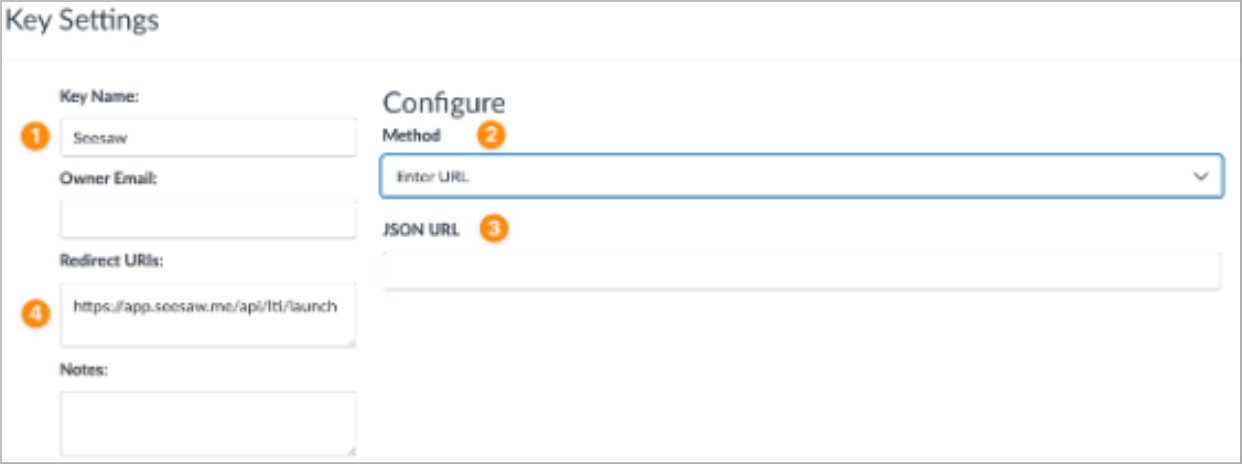
6. Click Save.
7. Toggle State to ON.
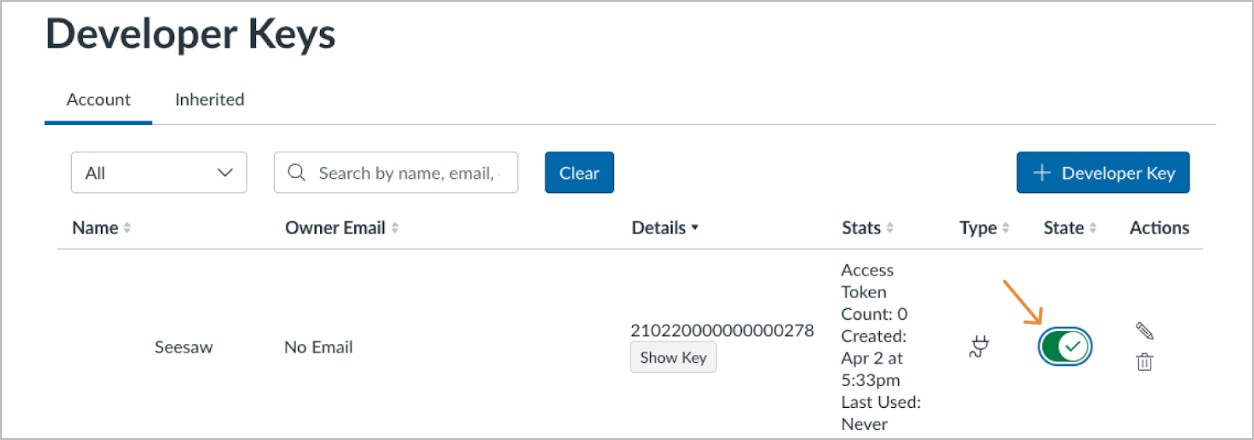
8. Take note of the Canvas URL in your browser. (You'll need this for a few steps.)

9. Copy your ClientID from under Details in the Developer Keys view.
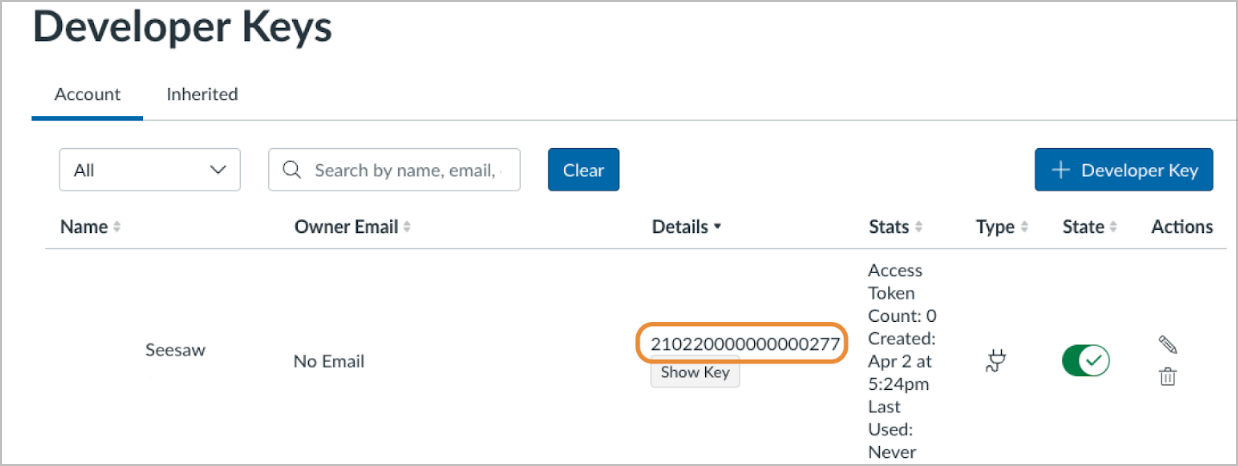
10. Navigate to Admin and click the Settings tab.
11. Click the Apps tab.
12. Click View App Configuration.
13. Click +App.
14. Configuration Type: Select By Client ID.
15. Paste the ClientID and click Submit.
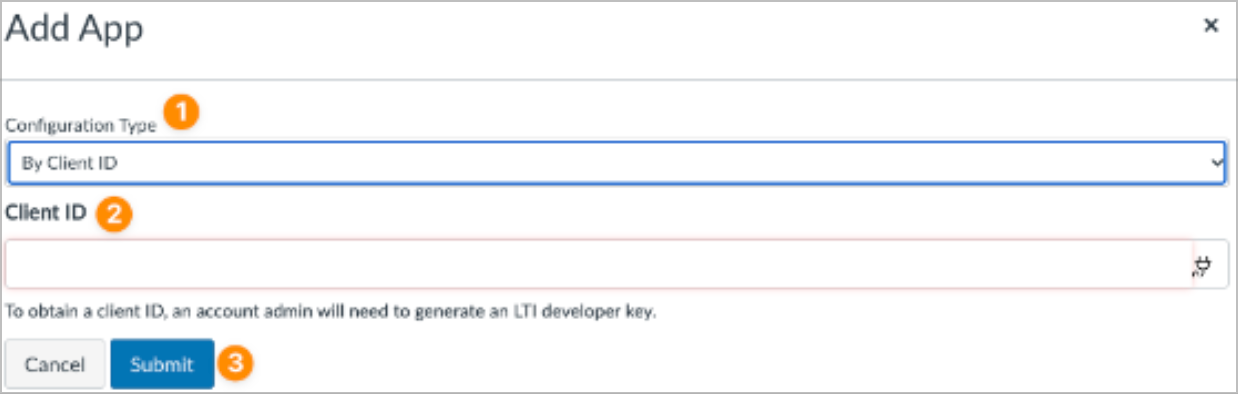
16. Click Install and "Yes, Install Tool.
1. In Seesaw, tap District-Wide Settings on the District Dashboard.
2. Tap LMS Integration.
3. Select Canvas and click Next.
4. Tap Copy Json URL.
Next, go to Canvas and log into your Canvas account.
1. Navigate to the Admin tab on the left side panel.
2. Scroll down and click on Developer Keys in the secondary panel.
3. Click +Developer Key.
4. Select +LTI Key from the dropdown.
5. Enter the following on the Key Settings screen:
Key Name: Seesaw
Method: Select Enter URL
JSON URL: Paste the JSON URL from Seesaw
Redirect URI: https://app.seesaw.me/api/lti/launch
6. Click Save.
7. Toggle State to ON.
8. Take note of the Canvas URL in your browser. (You'll need this for a few steps.)
9. Copy your ClientID from under Details in the Developer Keys view.
10. Navigate to Admin and click the Settings tab.
11. Click the Apps tab.
12. Click View App Configuration.
13. Click +App.
14. Configuration Type: Select By Client ID.
15. Paste the ClientID and click Submit.
16. Click Install and "Yes, Install Tool.
Admin steps for setting up Canvas LTI in Seesaw
1. Enter your Canvas URL and Client ID.
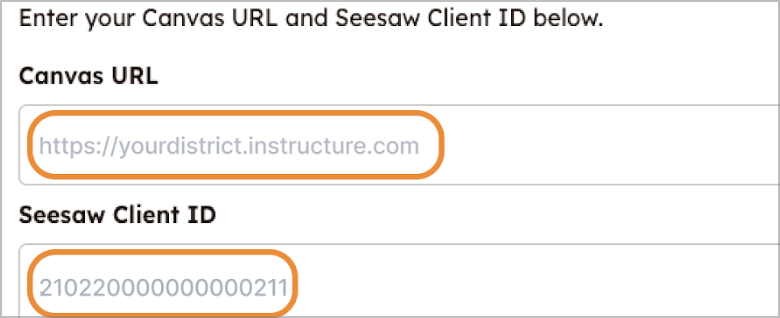
2. Tick the box confirming you have added the Seesaw App in Settings and click Set up Canvas Integration.
3. You will see a confirmation screen.
Congratulations, Seesaw and Canvas are now integrated!
2. Tick the box confirming you have added the Seesaw App in Settings and click Set up Canvas Integration.
3. You will see a confirmation screen.
Congratulations, Seesaw and Canvas are now integrated!
Note: Teachers will need to set up the Canvas integration for each Canvas class they want to add Seesaw activities to by following these steps.